One of the most exciting parts of friends having little humans is the fact that I can now expand my cake making to include baby themed decorations. I've found that if there are no babies present, it seems a little odd to do make an adult a baby themed cake or cupcake-especially if it's a man.
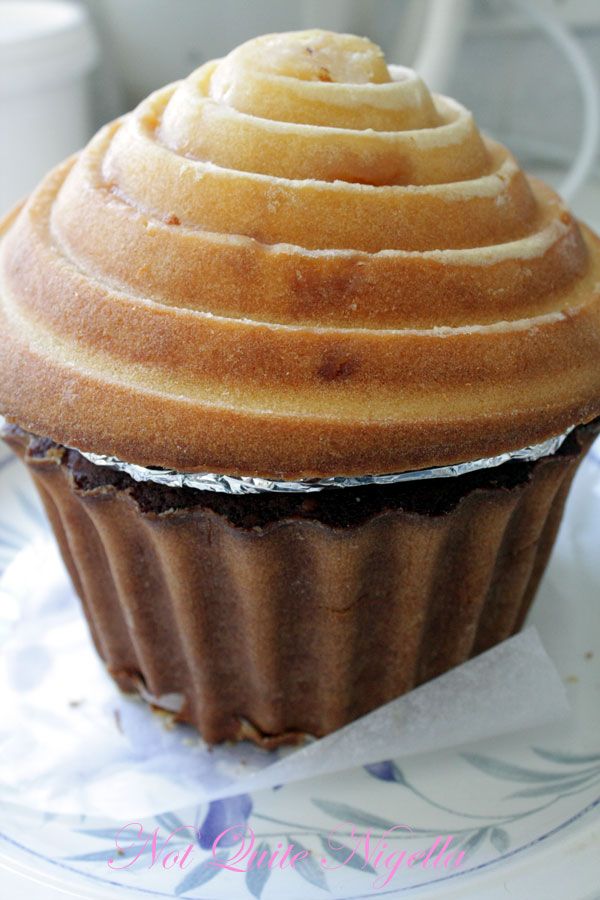
Baby Audrey Louise's 1st Birthday was certainly cause for a new cake. And it's a cake I had been dying to make for months, having finally thought of a new use for the Wilton Giant cupcake pan that I got for my birthday a while back. I rang every store that I knew looking for a Carousel Horse to no avail so I headed where any good baker does and went to ebay (a site I have a love hate relationship with) and found a seller selling a vintage Hallmark Rocking Horse cutter. Once my big box of cutters
arrived I ripped open each tissue paper wrapped cutter in search of the rocking horse. I cut it out and it looked great and cut so cleanly and evenly and also had the markings on the horse.
Making the carousel horses was fairly easy once I had the cutter. I've given directions on how to do the horses although you will need some sort of horse cutter. I realise that Rocking Horses are in fact different to Carousel horses but I'm hoping you will forgive the slight. I've given instructions on how to make the horses and the carousel, although I know it's by no means perfect or even vaguely passable as a real store bought cake, I'm sure you can improve on my version.
The giant cupcake recipe is one adapted from the Crabapple Cupcakes book for a white chocolate mud cake. I added honey as it seemed appropriate for a sweet baby girl's 1st birthday. Their recipe specified 4 cups of sugar which seemed too much so I halved it and made some of the sweetness from honey. The cake itself is lovely and dense with a crunchy crust.
I won't lie, it's a fiddly cake that requires lots of hours but it was rewarding if exhausting. I will suggest that you affix the fondant onto the serving platter. I wanted to put this on a cake stand but I just couldn't bring myself to move it, just in case...if something fell off I would myself have a child size tantrum.
Carousel Cake
Did you make this recipe? Share your creations by tagging @notquitenigella on Instagram with the hashtag #notquitenigella
Rated 5 out
of 5 by
1 lovely
reader. Share your rating:
Step 1 - Preheat oven to 155'C.Butter, oil and flour the Cupcake pan to make it as easy as possible to remove it from the tin.
Step 2 - Place flour and baking powder together into a large bowl. Make a well in the centre. Set aside.
Step 3 - Put butter, milk, castor sugar and white chocolate into a saucepan on low heat. Stir continuously until the chocolate has melted and sugar has dissolved. Remove from the heat and cool.
Small lumps of flour, try and get these out as best as you can
Step 4 - Add the eggs and vanilla extract into the cooled chocolate mixture. Pour this mixture into the well in the flour and fold together until well combined in three or four lots. You may find small lumps of flour with this amount of batter, try and get rid of these as much as you can.
Step 5 - Using a soup ladle, pour into the cupcake pan. Bake for 75-85 minutes or until a fine skewer inserted comes out clean (the base will take longer to cook than the top). Allow to cool for 15 minutes before turning out.
For the purposes of the tutorial below I used the same coloured fondant, only because when I was making the original horses, I didn't have someone to help me photograph the steps to making a horse. When I did, I just rolled out the violet fondant instead of rolling out 2 or 3 colours.
You will need:
A horse cutter (I used a Vintage Hallmark Rocking Horse cutter)
Coloured fondant (I used white, aqua, pink, violet and red)
cornflour to dust
Tiny hearts (bought)
toothpick
Rolling pin
baking paper
paring knife
Dipping cutter in flour
Cutting out the horse
Step 1 - Roll out white fondant. Dip cutter in cornflour and cut out horse, brush off excess cornflour. Set aside on baking paper.
Cutting out the saddle
Finishing off the saddle
Cutting out the mane
Perfecting the mane
Finishing off the mane
Step 2 - In a contrasting colour roll fondant a little thinner and using a round shaped cutter about the side of the saddle (I used part of a heart cutter) cut out the saddle. Also cut out the mane part of horse's head (you can cut out the whole head and trim it with a paring knife) and using the knife, draw lines for the hair. Lastly cut out a triangle for the tail and using the knife draw lines for the tail hair. Press out little flowers (or use small bought flowers).
Step 3 - Wait to dry for a couple of hours. Using water, attach the saddle, mane and tail to the horse. Then attach the flower in a different colour to both the horse and the saddle/mane/tail.
Step 4 - Using a small amount of water, stick sugar hearts onto centre of the saddle. Leave to dry completely overnight (you can make these a few days ahead but the colours may fade).
Finished horse drying
Assembly
Once the horses and cake has been made in two parts you will need
Dowel rods and base
3 Dowel rods or disposable wooden chopsticks and a sharp knife
A round board the diamater of the cake or slightly smaller (you may be able to do away with the dowel rods and base but I am transporting this quite a while away and I wanted to be more safe than sorry)
Coloured fondant in purple, pink, aqua and yellow (or whatever colours you like) and cornflour to prevent it from sticking (I ended up using 1kg of fondant for the horses and the carousel but I had some coloured fondant left over)
Jam
Dowel rods being pushed into place
Round board on top of dowel rods so that the rods take the weight of the top half of the carousel
Step 1 - Measure height of the base of the cupcake. Cut dowel rods or chopsticks to the size. Insert vertically into cake at three even points so that the weight of the top half of the cupcake is evenly distributed among all 3 dowel rods. Place round board on top. Brush jam over cake. The bottom half of the cake is now ready to have the fondant put on it.
Reinforced and ready for fondant!
Step 2 - Roll out yellow fondant and cut according to the height of the cake. You may need to roll 2 or even 3 pieces to wrap around the bottom half of the cake or you can drape them from the top and hang them down. It will stick with the jam. Smooth fondant carefully with cornfloured hands. if ends need to be sealed together, they can be glued with jam or water.
Step 3 - Then place the top of cupcake on top of decorated bottom half. Brush this with jam.
Cutting out fondant to do carousel top
Step 4 - Roll out fondant and using a ruler and knife cut out long triangle shapes in two of the colours. Alternate colours as shown in the picture. trim any excess with scissors. Make a ball for the top and place on the very top for a flag pole.
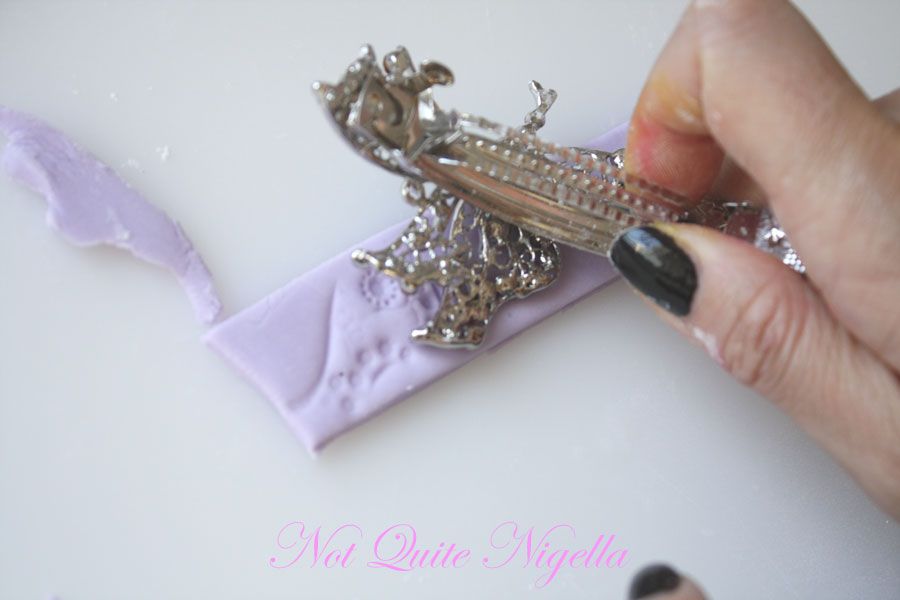
Use an embosser or a clean item with a pattern
5.Roll out the fondant using a ruler and knife and cut out 2cm wide strips. Using an embosser or something with a pattern ( I used a hairclip that I hadn't ever worn) make patterns. Or you can leave this plain. Using jam on the unembossed side, attach this to the edge of the top as pictured.
With fondant, before horses are attached
Step 6 - Using a toothpick and fondant make a flag. Leave to dry and insert when dry!


Reader Comments
Loading comments...Add Comment