Definition of a fool: 4. an ardent enthusiast who cannot resist an opportunity to indulge an enthusiasm (usually prec. by a present participle)
Definition of obsessed: adjective of verb obsessed. 1. to dominate or preoccupy the thoughts, feelings, or desires of (a person); beset, trouble, or haunt persistently or abnormally: Suspicion obsessed him.
It was clear, I was a fool and I was obsessed with macarons. The proof was in the pudding or the baking as it was. My obsession with baking macarons was getting out of hand. It was the idea of taming these temperamental sweet little French creatures had me making lot after lot of these. Sure they tasted fantastic, but they were missing the foot. Why oh why, or where oh where were the feet, my tortured mind asked? My very first batch making them with this oven worked just fine. But for the last few batches I had literally lost my footing, the prized frill at the bottom of the macaron that bakers seek. I tried a few recipes that I found on various blogs and none of them worked and neither did the Nigella recipe that had always worked for me.

Then It came to me when I was thinking about it (and remember that I was obsessed so I was thinking about it a lot). I kept my almond meal in the fridge. Was this the culprit? I tried having all my ingredients at room temperature and a new recipe from the blog A La Cuisine which seemed to produce some great frilly feet and lo and behold, after much nervousness and pacing back and forth in front of the oven, my feet came back! I was no longer footless! There were some things, some may call them superstitions, that I feel helped.
-
Use good quality baking trays, double them up if you need to
-
Draw circles in pencil on parchment but flip it over, don't pipe directly onto the pencil
-
Separate and age your egg whites. That is, separate the eggs the day before and allow them to thicken at room temperature. I covered them with a sieve so that bugs couldn't get in. It is also Winter here so it doesn't get very warm.
-
Use everything at room temperature.
-
Be sure not to over or under mix. OK that could be a stupid thing to say but I suspect I was undermixing, stopping when they were just combined and I think I should have kept mixing a bit more.

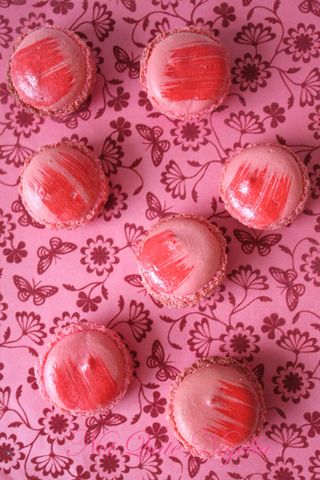
The reason why I wanted to make these was to practice this technique of paintbrushing a pattern on top. It's always best to try this out on a piece of paper before embarking on painting your precious macarons. I found it easiest to dip the tip of the paintbrush into the colouring, then blot it on the side of the bowl and then place it on the left side of the macaron holding it for a second or two before whipping it lightly across. It's all trial and error though and no doubt you'll end up with your own beautifully artistic version of a sweep. And with that I'll book myself back into macaron rehab. I thought I had kicked the habit but it appears the urge is as strong as ever.
Tell me Dear Reader, what obsessions or foolishness have you had? And are you cured? Or are you happy not being cured?

Paintbrush Macarons
Macaron Batter
-
1 ¼ cups icing sugar
-
4 oz (1 cup) almond meal
-
¼ cup plus 2 tbsps egg whites at room temperature
-
pinch of salt
-
¼ cup granulated/caster sugar
-
A few drops of colouring
All ingredients should be at room temperature

Step 1 - Allow egg whites to thicken by leaving them uncovered at room temperature overnight.
Step 2 - On three pieces of parchment, use a pencil to draw 1-inch (2.5 cm) circles about 2 inches apart. Flip each sheet over and place each sheet on a baking sheet.
Step 3 - Push almond flour through a sieve, and sift icing sugar. Mix the almonds and icing sugar in a bowl and set aside. If the mixture is not dry, spread on a baking sheet, and heat in oven at the lowest setting until dry.
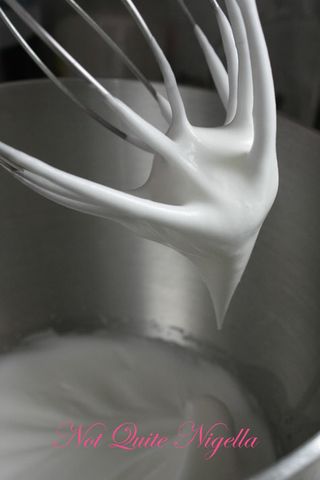
Step 4 - In a large clean, dry bowl whip egg whites with salt on medium speed until foamy. Increase the speed to high and gradually add granulated sugar. Add colouring and continue to whip to stiff peaks the whites should be firm and shiny.
Step 5 - With a flexible spatula, gently fold in icing sugar mixture into egg whites until completely incorporated. The mixture should be shiny and flow like magma. When small peaks dissolve to a flat surface, stop mixing.

Step 6 - Fit a piping bag with a 3/8-inch (1 cm) round tip. Pipe the batter onto the baking sheets, in the previously drawn circles. Tap the underside of the baking sheet to remove air bubbles. Let dry at room temperature for 1 or 2 hours to allow skins to form (I let mine dry for 1.5 hours).
Step 7 - Bake, in a 160C/325F oven for 10 to 11 minutes. Use a wooden spoon to keep the oven door slightly ajar, and rotate the baking sheet after 5 minutes for even baking.

Step 8 - Remove macarons from oven and transfer parchment to a cooling rack. When cool, slide a metal offset spatula or pairing knife underneath the macaron to remove from parchment.

Recipe adapted from A La Cuisine.
To fill and decorate
-
1 tablespoon liquid food colouring mixed in a small bowl with 1 tablespoon of water
-
a pastry brush or paint brush (not a silicon one)
-
A few sheets of paper to practice the paintbrush marks on
-
1 lot of buttercream (see recipe below)

Step 1 - Practise doing the brushstrokes on the pieces of paper before doing it on your precious macarons. Believe me, I regretted doing so otherwise. I found it easiest to dip the tip of the pastry brush in and then blot it against the edge of the bowl, hold it down for a couple of seconds on the left hand side edge and then sweep it across lightly towards the right. As you can see on the piece of paper above, the strokes on the left hand side are the first ones and the right hand side ones improve as time goes on.

Step 2 - Brush all of the tops of the macarons, choose the best swirls of the lot and match them with similarly sized bottoms. Allow them to fully dry (about 15 minutes) before sandwiching (to avoid getting colouring everywhere).
Step 3 - Pipe buttercream onto the bottom macaron and then sandwich with top macaron et viola!
Magnolia Bakery's Buttercream frosting
-
1/2 cup (125grams) unsalted butter, softened
-
3 to 4 cups icing sugar
-
1/4 cup milk
-
2 teaspoons vanilla extract
-
Food colouring if desired
Step 1 - Place the butter in a large mixing bowl. Add 4 cups of the sugar and then the milk and vanilla. On the medium speed of an electric mixer, beat until smooth and creamy, about 3-5 minutes.
Step 2 - Gradually add the remaining sugar, 1 cup at a time, beating well after each addition (about 2 minutes), until the icing is thick enough to be of good spreading consistency. You may not need to add all of the sugar.
Step 3 - If desired, add a few drops of food coloring and mix thoroughly. (Use and store the icing at room temperature because icing will set if chilled.) Icing can be stored in an airtight container for up to 3 days.


Reader Comments
Loading comments...Add Comment