
There's only one thing that can provide comfort when you wake up at 8am on a cold, windy Sunday Spring morning. When you look over to see the glowing red numbers read 14 degrees and mumble "What happened to Spring?". The normal instinct is to huddle under the covers with a loved one. However as my loved one Mr NQN was snatched from me at 3am that morning to go into work I consoled myself with my second loved one, chocolate at a chocolate class at Coco Chocolates newest chocolate school in Mosman.

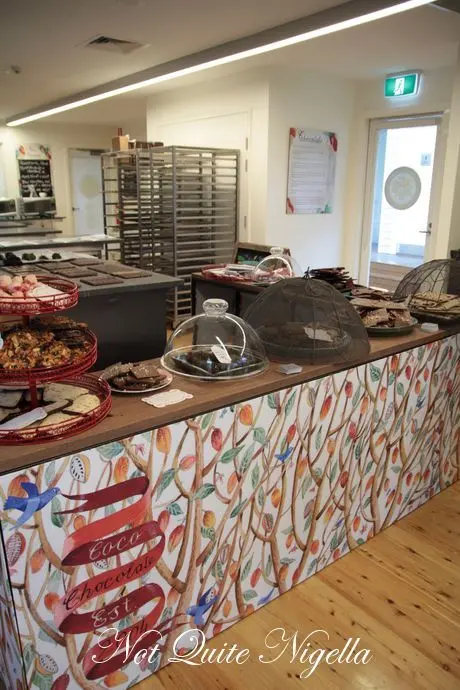
I'm on my own driving and remarkably arrive incident free across the bridge at Middle Head just past the cafe at Burnt Orange. There are a range of buildings and the Coco Chocolate school and "cellar door" is located at number 21 which faces the carpark. On a sunny day (not today) the lawn area outside is where kids can play and should you want to while away the hours and nibble on chocolate coated strawberries, a glass of Bollinger champagne will set you back a mere $28!

As Mr NQN was called in for work, I asked his sister Amaya if she wanted to join me at the chocolate class and delighted, she accepted. It's raining heavily in fat hard drops or even horizontally at times and yet all five of us students can't imagine spending this rainy spring day anywhere else. We start off with a hot chocolate (or coffee or tea but really, who is going to say no to a hot chocolate?).


I choose the fragrant nutmeg hot chocolate to take the cold edge off the day. Today's class is an all day class and on the last Sunday every month Rebecca Kerswell the owner of Coco Chocolates who has two boutiques in Sydney and two in the U.K. and are the exclusive chocolatiers to Harvey Nichols and Jenner's in Scotland. And interestingly, Jenner's said no to a Haggis chocolate but they're working on bringing one out here instead! There are all day classes on the last Thursday and Sunday of each month and half day classes are on the last Wednesday and Fridays of the month (except December for both class types). Today's class is a level 1 class where we cover hand tempering, an almost lost technique of tempering couverture chocolate. The children's classes are held every Tuesday during school holidays.

The next level 2 to be held around Christmas (dates to be announced) sounds very exciting as students will learn how to paint and decorate chocolates using a spray gun and cocoa butter as well as caramels and pralines and decorate the butterflies above! And the biggest hit of them all is the children's classes where kids learn how to make chocolate freckles, frogs and chocolate nests with students as young as three years old. Although Rebecca tells us that one student asked to make the rose creams and told her that she only liked dark chocolate!

Rebecca started her career as a chocolatier ten years ago and studied at the Valrhona school for chocolate in Lyon. Hand tempering on marble (nor granite as many kitchens use) is somewhat of a dying art. At a Manchester chocolate festival they asked people how many hand temper and only three people put up their hand. Most places temper chocolate using large machines. Here at Coco, she hand tempers and uses single origin Valrhona chocolate and organic ingredients.

Cocoa beans come from a cacao tree which can grow anywhere but only bears fruit 20 degrees either side of the equator. The pods are roughly the size of a football and inside the cocoa pod the cocoa beans are encased in a sweet, white coating. Larger companies simply wash off this coating but the coating apparently has a wonderful pineapple and honey flavour to it and they sometimes makes liqueur from it. Ideally, for a wonderful tasting chocolate, they steep the cocoa beans in the white coating and allow the sugars from the coating to infuse into the beans giving it a sweet flavour. And once this is done the best way to dry the cocoa beans is in the sun although many places use something similar to a big air dryer.

The next process that amalgamates everything together is called conching. It is the most expensive process in chocolate production as they pay per hour for the conching process which is the mixing process that ensures that the chocolate has a smooth finish. Cheaper chocolate is conched for only five hours whereas more expensive chocolate is conched for a period of three days. Conching brings the particle sizes down so the cheaper chocolates are grainier whereas the more conching is done, the finer the chocolate. And it is called conching because originally the paddles that used to mix everything were shaped like conch shells although they are no longer shaped that way.

Which brings us back to tempering which is what you need to do to couverture chocolate to give it that lovely glossy coat and lovely snap when you break it. Tempering chocolate properly also results in a lack of bloom which results when the fat and sugar separates from the chocolate and rises to the surface and this can be from taking to too high a temperature or flucutating the temperatures. Which brings us to the microwaves.

_
_
Rebecca prefers to heat chocolate in a microwave because it is a dry way of melting chocolate rather than a double boiler as water of course can be the enemy of chocolate and a tiny drop can make chocolate seize. She tells us that at the Valrhona school they have a wall of microwaves to melt the chocolate. She microwaves the 3-4 kilo lots of chocolate in 60 second bursts at 100% power ensuring to stir it every time as microwaves can create hot spots where chocolate burns. And once it is nearing the temperature, she decreases the time to twenty second bursts.


Which brings us to her next tool, an infrared temperature gun and the diagram that tells us the temperatures at which we need to heat chocolate. Each type of chocolate (dark, milk and white) needs to be tempered to a different set of temperatures. Essentially you heat chocolate up to a temperature, cool it down and then heat it back up to a temperature which is somewhere between the first two temperatures. And to tell the exact temperature which is quite crucial you use an infrared temperature gun (approximately $120).

The chocolate looks almost done according to the temperature gun and Rebecca shows us a little trick to tell if it is ready. If you dip a spatula or spoon in and then leave a trickle of chocolate in a circular pattern, if it sits on top and doesn't sink in then it is ready for the next stage.


And the next stage is a doozy-it's loads of fun and involves spreading out the entire bowl of chocolate onto the marble bench. With your two tools, a long angled spatula and a chocolate scraper tool (both bought from Chocolate World in Belgium) you cool down the chocolate. First you pour almost all of the bowl's contents (leaving say 10% or so in the bowl) onto the marble slab. Marble controls heat very well and so it is the surface of choice although it is also very expensive to have.


Nothing cools or works better on chocolate than marble and it cools it down immediately. To clean marble you simply scrape it and use hot water and then clean it using a microfibre cloth which doesn't leave any fluff. And Coco's dark chocolate is for vegans so she only makes dark chocolate on a surface that has been thoroughly cleaned between uses.

To spread out the chocolate you can use a figure eight pattern with the scraper and then you scrape it at a 45 degree angle into the centre and then scrape off the excess chocolate on each side of the scraper with the spatula. You repeat this process once going around the marble bench and between each round you take the temperature of the chocolate.

You generally want to stop when you are one degree away from the desired temperature as you will generally lose a degree moving the chocolate from the bench back to the bowl. Rebecca sits the bowl with the 10% of chocolate in it on a stool at the side of the bench and then scrapes the chocolate back into the bowl to heat back up.


She gives it a good stir mixing up the cooled down chocolate with the warm, melted chocolate that was still in the bowl and then takes the temperature now of the chocolate. It usually needs upping by a few degrees and this is where her next tool comes in handy-the heat gun (or if you're at home you can use a hairdryer). To use a heat gun she usually waits for it to get to about 200 degrees Celsius and then heats the chocolate stirring constantly, taking the temperature at intervals. At the Valrhona school they learn to gauge the temperature by putting some chocolate on their lip but that is something that you learn over time. You generally have two degrees either side of the temperature guides as leeway. If the chocolate is overheated then it won't set properly.

She shows us the molds that we are going to use to make the raspberry white chocolate hearts. She uses poly carbonate molds from Chocolate World which are expensive at about 60-70 each but they are excellent quality and last for a very long time. When you see the smashing that they have to put up with later you don't want the cheaper plastic ones! You never use detergent on chocolate molds, only hot water and to ensure that there isn't already chocolate on the mold you use a cotton wool ball on it to remove any residue.


She shows us some freeze dried strawberries and she asks Barbara and Philippa to crumble them into the heart shaped molds. We will then learn the filling technique for the chocolates where we ladle chocolate onto the top of the mold and then scrape the excess chocolate off the top.


The next step is to tap the molds against the counter-quite sternly I might add so the long wearing molds are very important here! This is to get rid of any air bubbles and we are surprised at how many air bubbles pop to the surface. We take turns filling the molds and Rebecca then pops the trays in the fridge for just one minute to give it a quick chill and then lays the trays on the shelves. And she tells us to leave a tray space of two trays above and below each tray as each new tray gives off heat which can affect the other cooling tray.


Onto our next challenge and this is a relatively easy one. Have you ever made chocolate bark or slabs? Well this is a quick and easy chocolate with striking results. Here she takes the temperature of the chocolate and sees that it is still fine so she then mixes up half of the quantity of a crumbled freeze dried mixed berry selection including blackberries, blueberries, strawberries and mulberries.

You then line a baking tray with parchment and pour the chocolate and then spread it out using the the scraper and then sprinkle some more crumbled freeze dried berries on top afterwards! Et voila, easiest chocolate ever :)


Student Philippa then tempers the next lot of milk chocolate while we set out our freckle molds. The trick to these is to work very quickly as the freckles are very thin and need to be made and sprinkled before it sets.


Amaya and I chop up some hazelnuts as Philippa tempers the chocolate and lowers the temperature on the marble slab. Once it has reached the correct temperature I slide it into the bowl that sits on a stool at the end of the table.

With the remaining milk chocolate we make a hazelnut and sea salt chocolate slab which again just involved spreading out chocolate and allowing it to set and then breaking it up into pieces. And yes it is messy but delicious work!


We take a peek at our raspberry heart chocolates and they look gorgeous. Rebecca looks at the underside of the tray and shows us where there is still some moisture contact between the chocolate and the mold. Ordinarily you would wait until this disappears but we unmold ours as the moisture is almost all gone. A quick tap on the bench releases most of them and you need to move these to avoid crushing them and then tap until all are released. And if you've done a good job tempering them they release and have a beautifully glossy coat.


Our next tempering job is done on the dark chocolate and we will combine this with freshly ground pink peppercorns and nutmeg as well as make some rose creams in the heart shaped molds. Here, to create a thin layer of chocolate on the front of the mold, you fill it with chocolate, tap it to remove any airholes and then tip it upside down to tip out any excess chocolate. Lastly, scrape across the mold to remove any excess chocolate.

To make the bar chocolates, ensure that the molds are clean and then add the peppercorns and nutmeg to the dark chocolate and then fill the bar molds with chocolate, tap and then scrape again.

It's lunch time! And an interesting point that Rebecca makes when it comes to lunch is that chocolate absorbs flavours very easily. This means at this kitchen where they make their chocolate, they can't prepare other food as the chocolate would absorb the other flavours. So we traipse across the lawn to the nearby Burnt Orange cafe (where I can't wait to go shopping!) and eat. Lunch is one hour long and is included in the price and comes out as platters of food to share. There is a cured meats platter with prosciutto, salami, bresaola cornichons, olives, hummus and two tangy chutneys.

The vegetarian platter has frittata, roasted beetroot, two dips, a delicious cannellini bean salad, olives, a thinly sliced rye bread a delicious Irish soda bread. There is roughly one platter for every two students and there is more than enough food.

Of course no visit to Burnt Orange is complete without going shopping and we head downstairs where I go a little mad buying cards and a little cow milk creamer ("Why?" says Mr NQN. "It's cute" is my answer). Before we know it, our hour is up and we head back for a cup of tea.


This afternoon we are going to fill the rose creams, make our own hot chocolate and then make tiny little green frogs. Now that the tops for the chocolates have set we fill them with a rose cream which is made from organic rose oil and sugar fondant and some water to make it liquid. We pipe this from a piping bag into the molds leaving a gap for a thick base. The key here is not to overfill or have any drips as the chocolate seals the syrupy rose cream inside.

While these are being filled, we try our hand at wrapping the bar molds. We tap the bar molds onto the bench and they slide out easily with a beautifully glossy sheen to them. So far the tempering has been done well by the students and there isn't any blooming which can show up as early as now. We take a sheet of glassine and wrap the bars and then take a sheet of decorative wrap and voila, our bars are ready for sale! Or actually consumption by us really...


After tempering one last batch of dark chocolate, we fill in the rose cream chocolates ladling the chocolate carefully keeping it level so that the rose cream centres don't tip out. We scrape the chocolate but this time we don't tap the molds as this would mix the chocolate and fondant. And we let them set after a minute in the fridge.


Our second last chocolates are the little froggy chocolates where we paint the molds with green lustre dust using a dry paintbrush. You can also mix the lustre dust with cocoa butter to get a more brushable consistency. We fill the molds, tap them and then scrape them all of us now familiar with the process. And these are tiny molds so while we do tap then molds to get rid of air bubbles, there are fewer and they are smaller so you need to watch out for them!

While the froggies are setting, we finish of the rose creams by adhering a little crystallised rose petal to the chocolate by using some liquid chocolate.


Hot chocolate time! And how do you make your very own nicely presented hot chocolate which by the way is a great present for Christmas? Rebecca tempers the chocolate and then spreads it out. We have a minute spare while it is drying so we turn out the frogs where we see that there is some bloom on the frogs. It may be the temperature but Rebecca tells us that it's likely to be turning them out too soon that has resulted in some bloom.


After a minute or two the chocolate has started to set so we grab a scraper and holding it at a 45 degree angle (never a vertical 90 degree angle) we scrape at the layer of chocolate making large curls and flakes. These are then emptied into a large canister where Rebecca adds some Valrhona pure cocoa and then shakes it up, allows it to settle for a few second (to avoid a cocoa cloud) and there you have it-your very own hot chocolate mix to make with milk!

To make one of her more popular hot chocolates (and one of my favourites) she makes white chocolate flakes and mixes them with pounded lemongrass over a period of three days. Every day she shakes the box to release more flavour as chocolate absorbs flavours.


And at the end of a chocolate filled day which was reward in itself, we get a chocolate party bag to take with us with a selection of all of the goodies that we made today along with a certificate.

So tell me Dear Reader, have you ever made your own chocolate or hand tempered chocolate?_
_
NQN and Amaya attended the Coco Chocolate School as a guest of Coco
Coco Chocolate Studio & Sydney Chocolate School
Building 21, 1110 Middle Head Rd Mosman 2088
Tel: +61 (02) 9960 6540
Open Wednesday - Sunday 10.00am - 4.00pm
Classes are held on the last Sunday and Wednesday of each month


Reader Comments
Loading comments...Add Comment