
Dear Reader, once upon a time, I used to wish for certain things around birthdays and Christmas:
-
To receive a Barbie Fashion Face-you can see my penchant for over applying makeup started here...
-
To see snow.
-
To ice skate-that was beyond sticking freezer bags on your feet and sliding around on the carpeted floor in the house (please tell me I'm not the only one that did this?).
-
To have a birthday with a piñata. The idea of bashing about something and having lollies and candy rain down on top of my friends and I was like the childhood version of Oprah's "You get a car!!" moment. What seven year old kid needed a car? Candy was a much more tradeable commodity. And bashing about a paper mache structure helped work off some of that red cordial buzz.

When I first saw some piñata cookies on Pinterest that contained a little sprinkling of mini m&m's I was instantly delighted, my predilection for pinatas exposed. I thought the idea would be perfect for Christmas where I would make a Christmas gift version where you would bite into the 3D model of a Christmas gift made out of cookie and out would pour a little sweet surprise.

The cookies were surprisingly easy to put together and you don't need to use a present cutter, just a square one will do and you can just tie them in the top with actual ribbon instead of fashioning it with fondant. What you end up doing is sandwiching three layers together with icing sugar "glue" and the middle layer has a cavity inside that hides the candy. You can make them a bit thinner although I made mine quite thick so that they could stand up as 3D presents. This does mean that there's quite a bit of cookie to eat here which is not a bad thing (and kind of like a child's dream come true).
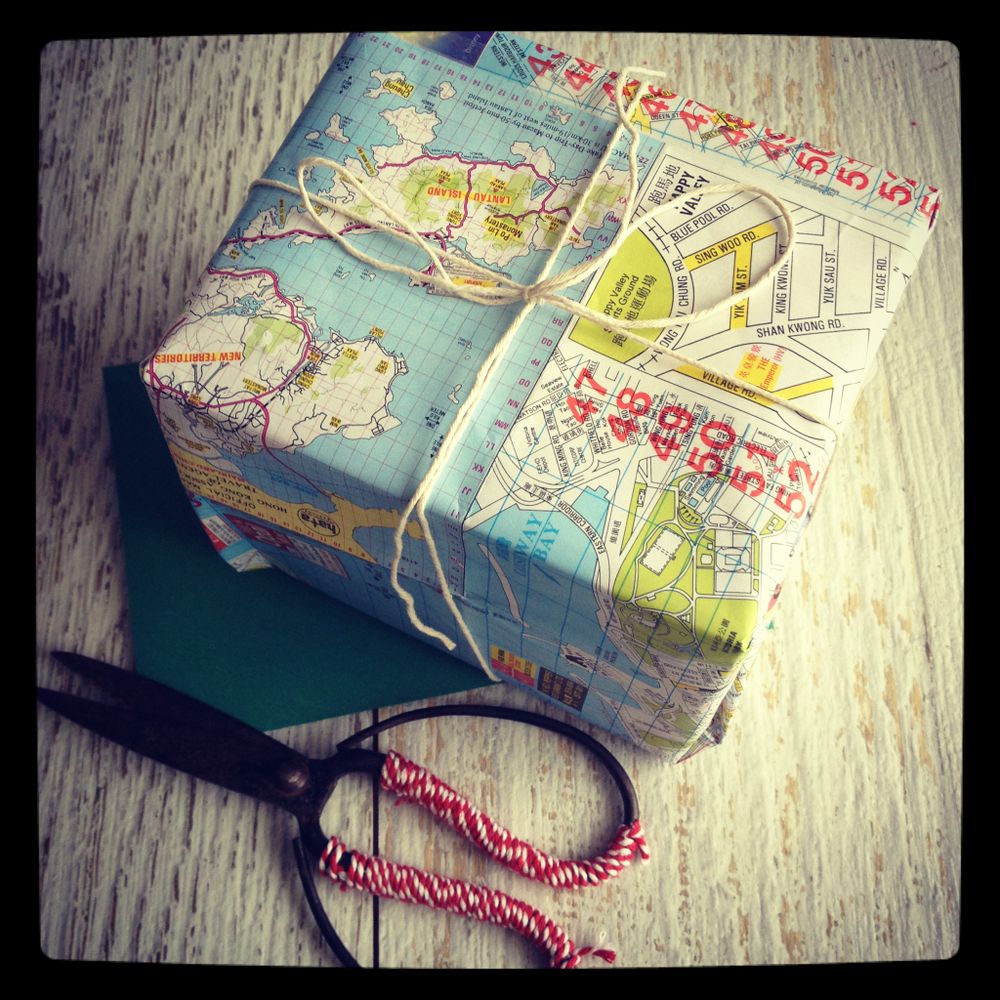
I ended up nibbling on some as I was busy wrapping gifts. This year, I took a cue from Brydie who used an old map to wrap presents in. You can recycled old maps or street directories and not only do you save on buying paper, you can choose a map or an area that means a lot to the person to whom you're giving a gift. Clever, chic and green! I usually recycle gift bags as I figure that people can use the bags to carry their presents home too.
So tell me Dear Reader, how are you tracking for Christmas? Are you ready and what are you making? And are you a wrapper or a bagger when it comes to gifts?

Christmas Gift Cookies...With A Surprise!
Makes 6-8 completed cookies depending on the size of your cutter
-
170g/6 ozs butter, softened
-
280g/10 ozs white caster superfine sugar
-
2 eggs
-
2 teaspoons vanilla
-
360g/12ozs plain all-purpose flour (or more if using colouring)
-
Colouring (optional)
To decorate and fill
-
Coloured and white fondant
-
Decorations
-
Edible gold lustre paint
-
25 ml vodka
-
Paintbrush
-
1/2 cup icing sugar and a few drops of water

Step 1 - Make cookies. In a large bowl, cream together butter and sugar until smooth. Beat in egg, colouring if using and vanilla. Add in the flour on the lowest setting making sure that the dough isn't too sticky-the stickier it is, the more the baked cookies will expand. If you have to, add a little more flour-if you are using liquid colouring, you will need to add more flour). Cover, and chill dough for at least one hour.

Step 2 - Preheat oven to 400 degrees F (200 degrees C). Roll out dough on floured surface-the thickness will depend on how many m&ms you want to put inside and how thick you want the cookies-you will put three together. Cut into shapes with a square or gift shaped cookie cutter. **If you use a gift cookie cutter and it's not symmetrical, don't forget to flip the cutter over and cut out the shapes using the slightly blunter side so that they will line up with each other. **

Step 3 - Place cookies 1 inch apart on parchment paper. Bake for 8 to 10 minutes in preheated oven. While they're hot, cut them again using the cookies cutters as they will have expanded a bit from baking and you want them to line up exactly against each other. Then in the "middle" piece, cut out a hole as this is where the little m&m's will sit. Cool completely and then just line each set up together.

Step 4 - On a non stick chopping board roll out the white fondant. I always find it easier to do the white fondant first as coloured fondant can transfer easily. Make the bows but rolling out a long thin piece of white fondant and shape into a bow-it may be hard to do this as first but gets easier with practice.
Step 5 - Roll out the coloured fondant and cut it using the same cookie cutter. Using a little water, adhere it to the cookie on the front and back. Affix little decorations using a little water-I used snowflakes and stars and also made little green dots using green fondant and punching them out using a straw.

Step 6 - Mix the vodka with the gold lustre dust and paint it onto the white fondant and allow to dry.


Step 7 - Make a simple icing sugar "glue" by mixing 1/2 cup of sifted icing sugar with a few drops of water and glue one side to the middle piece with the hole cut out. Fill the hole with mini m&m's or small candies (those teeny tiny sugar hearts are also lovely) and then icing sugar glue the top to the middle. Allow both the fondant to dry and the icing sugar glue to set fully.


Reader Comments
Loading comments...Add Comment