Recipe: Bourke Street Bakery Recipe »
Many years ago when I lived in Japan I had one of those Tamagotchis. In case you are unfamiliar, it was an electronic toy that you had to keep alive by "feeding" it and "changing" it, all with the press of a button. It was said to give you a vague idea of what having children would be like although at I must say, it was a rather accelerated version. If you didn't feed your Tamagotchi then it died rather dramatically and suddenly.
It was my three week old Tamagotchi that I think of whenever someone asks me if I have a sourdough starter. My first response is "I kill things!" like plants or electronic surrogate children and the idea of having to constantly feed a starter alarmed me, particularly since I travel a lot and we have enough trouble remembering to water the plants. Nevertheless, I still remained curious about sourdough baking. My friends Celia and Brydie are fabulous sourdough bakers and I have always admired their efforts from a cautious distance.

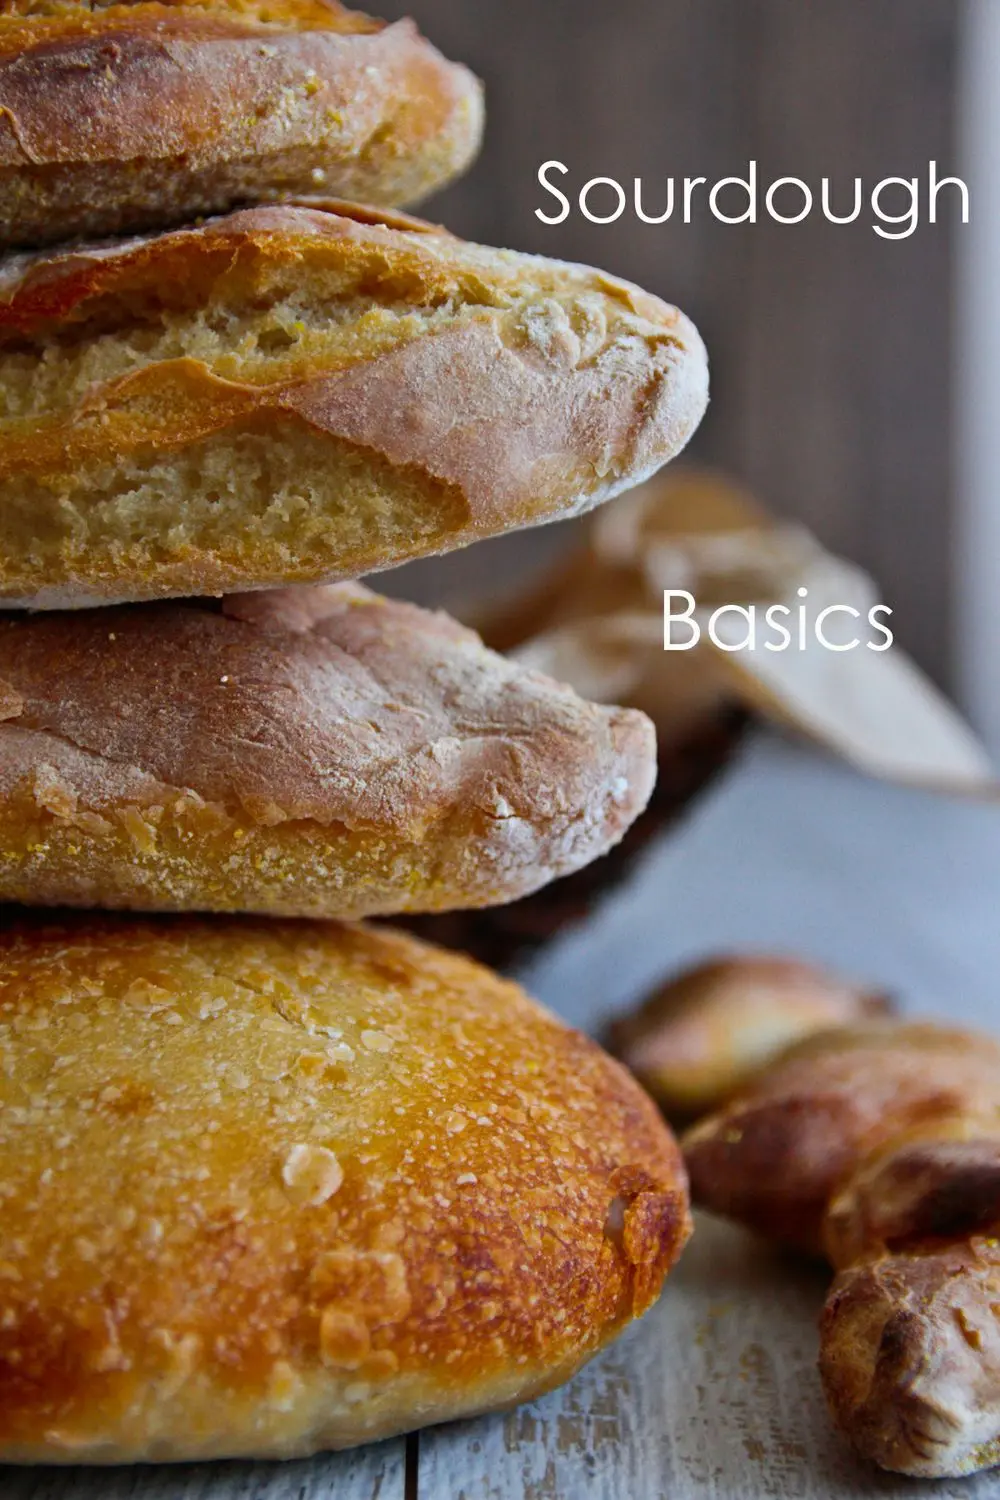
So when I was asked if I wanted to try out Bourke Street Bakery's new sourdough class my curiosity was peaked. Not only would we get to shape and make our own bread, they'd teach us how to create our own starter and we'd leave with dough, baked loaves and some of their starter. The classes are held on a Sunday afternoon and starts at 1pm and goes for two hours. My friend Girl Next Door and I are lined up in front of the counter, breathing in the heady aroma of their sausage rolls. Class participants are offered a drink and then we make our way into the baking area where Bourke Street Bakery's Master Baker Paul Giddings will show us how to create those blistered, golden loaves so prized and munched on by Sydneysiders.
On each bench is a recipe sheet and a set up for each of us and there are eight of us in today's class. You need to bring an apron because none are provided and there is plenty of flour involved. We are also asked to come without hand jewellery as we will be kneading dough by hand. On the handouts are the weights and quantities needed to create a 450g "personal" sized loaf. Measurements are down to grams and the starting point is organic flour. Paul explains that organic flours, because they are often a mixture of flours and wheat from all over the world and are therefore subjected to different weather conditions and rainfall, can often act differently whereas non organic flour reacts more consistently. Their organic flour is a blend of four grains from Wholegrain in Gunnedah with 12.2-12.5% protein.

Paul tells us that temperature control is the key to baking and when yeast is stored at 4C/39.2F it is inactive. As the temperature rises to the teens, the yeast is still sluggish but once it hits the high 20s and 30s it becomes very active. It is the process of retarding the dough (and then rising the dough) that determines the waxy crumb, brittle crust and caramel finish so desired in sourdough baking. You can bake a dough directly from the fridge but bring out your starter from the fridge an hour before.
Making a Starter (requires 3-4 weeks)

A starter or leaven is a spongy mixture that you use in place of dried or fresh yeast. Starters can be active or sluggish, they can also be sour or not sour. To create a starter, it is simple. You mix 100mls/3.5fl.ozs of filtered water with 100mls/3.5ozs of flour and allow the yeast spores in the air to come in contact with the mixture and colonise. You can also add some yogurt for active culture or hot water that has has raisins soaking in it and cooled for sugar. The starter needs to be left out at room temperature and refreshed once a day for 3-4 weeks. This involves discarding half of the mix and then feeding with 50gms/1.7 fl. oz. water and 50 grams/1.7 oz. flour. Once it's active, leave it out for two hours after feeding each day and then refrigerate.

Prior to using it, take it out from the fridge two hours earlier. If you are using the starter every day, you will need to feed it every day. If you are using it every 3-4 days you need to take it out even earlier. And two days before using it, double the size of the feed keeping in mind how much you will be taking out of the starter. It's important to keep the concentration of yeast in the starter. Using the raisin water can also bring back a starter that looks like it is dying.
If all of this sounds too much don't worry! At the end of the class they give you a cup full of starter and you can also buy dried starter on the internet which arrives as sachets of powder. Brydie also has a post on how to create your own starter here.
Mixing the dough

We start with weighing out our ingredients and placing them in a bowl. To the water, we add the starter and Paul tells us that white starters (i.e. not rye) should float which indicates good gas activity. He instructs us mix the flour, starter and water together with just your hand along and salt can be added after half an hour as salt inhibits the yeast and tightens the gluten (this delaying process is called autolyse). After covering it with a Chux or tea towel (rather than cling wrap), we leave it for half an hour.

Back at our work stations we attend to our dough again that has been resting for about twenty minutes. The texture has already changed and Paul tells us to wet our hands and work the dough again. It's similar to the Tassajara method of bread kneading and instead of working the dough with muscles, it's a folding action that activates the dough. Once it becomes elastic, we cover it and leave it in a warm place to bulk prove for about two hours or until double in size.
Shaping the dough

The two most important things to hold shape are seam and tension. Paul takes out some already proved dough and portions it out to us and our last step is to learn how to shape the dough. This proves to be one of the harder steps, and admittedly it's one that most of us just took for granted. We get a plain white sourdough dough and a fig dough and we split each in two. Working the dough to get a smooth surface proves particularly vexing and we want to be careful not to overwork the dough. Paul shows us that we make the dough into a ball, flour our hands and gently push the dough along it so that it becomes smooth.

Paul then shows us the process of shaping each loaf. Firstly, we stretch the dough out into a long piece and then fold it over as shown (top left). Pushing it down with your fingertips gently to flatten it, we then divide it in thirds, folding each side over (top right). We then take our fingertips and gently roll the dough over onto itself (middle image) until it has a seam as shown (bottom image). He then gently shapes them giving them slightly pointed sides by gently rolling them. They get a final coat of semolina. These are then placed seam side up in ricotta baskets which are lined with flour dusted Chux. We fold the Chux in the centre to make a border to separate the two loaves. These are then covered with a plastic bag and left to prove (the retarding process) for 5-15 hours in the fridge).

After retarding the dough, rising again and making tension
Because the class is two hours, there's a lot of going back and forth and looking at stages that were prepared earlier and to be honest, some of it confused me and I bake bread quite often. But the reason for us to take a look in here is to demonstrate the importance of tension on the loaf shape.To get a properly risen loaf, tension is important and to see if our dough is ready we test the tension by pressing down on the dough with a finger.

If it leaves an indent but slowly starts to come back, that is ideal. If it is overproofed, it doesn't spring back at all but if it springs back right away, it needs more time proofing it. The issue with overproofing is that the gluten has been stretched too far and has no strength to come back as the sugar has eaten too much gluten. Paul takes out some pre-shaped loaves of bread nestled within a ricotta basket between a Chux. The loaves have been placed seam side up so we gently turn these over and place them seam side down.

Before they go in the oven, we take a short, sharp paring knife and slice it from end to end in a curve pattern. We do this deeply and twice and this creates the signature curve and also adds texture to it and colour with the burnished rise and bubbles. Paul advises that the shallower the cut, the more volume and we should also bake our loaves with a baking stone on the bottom. He places these in the oven.
Obtaining the golden colour and blistering when baking
Steam is also important in getting all of the characteristics of a good sourdough like the golden colour and blistering. Thankfully you don't necessarily need a steam oven to do this. Paul suggests a few ways. You can spray the loaf with water from a misting spray. However I found the most effective way is to place a tray on the bottom of the oven (and I mean a regular household oven as that's all that I have at home) and on this tray you add a tray's worth of ice cubes and a couple of cups of cold water. Another hint that Paul tells us is to add a metal chain link length to the tray which increases the surface area (although I didn't really have a metal chain lying around and doubted Mr NQN would appreciate me using his bike chain ;)). The steaming helps to create a shiny coat over a dull one as well as blisters. Their oven is a non fan forced steam one set at 240C/464F but at home, he recommends baking them at 180C/356F. However I tried it at 180C/356F and could only get a pale loaf but as soon as I baked it at 230C/446F, I got the golden colour and blistering. The general rule is that a 400g/14.1 oz loaf takes 30 minutes to bake, a 700g/24.7 oz one 40 minutes and a 1kg/35.27oz. loaf takes 1 hour.

The alarm goes off and the breads that we've slashes are ready. Eagerly we take a look at our loaves. This is mine below-not bad but I'm sure I'm not going to be hired anyday! ;) Paul advises us to place the bread on a cooling rack to ensure that the bottom remains crispy.

We pop these into bags along with our slashed loaf, and everyone also gets a cup of the Bourke Street Bakery starter that was first started eleven years ago and a logo cloth bag with a loaf of freshly baked bread in it. We also get our kneaded dough which can be shaped into bread and then baked and along with everything else is a laminated one pager with instructions on baking bread covering the basics. I did find that some of the details weren't on the one pager so I'd advise to take a pen along to make notes.
So what happened when I got home? Because I had gone out and not baked the loaves straight away or put them in the fridge, I found that my loaves were pale and flat. I baked them at 190C and used the ice cube trick and the steam spray and whilst it tasted good, they were a pale and unappealing looking. I asked Paul what had happened and he said that the yeast had eaten too much sugar which had left nothing to caramelise.

I tried again a bit later and this time, I baked another two loaves (and by now, our freezer was so full of bread!). I used Celia's instructions on how to feed your starter and BSB's instructions on shaping the loaf. I baked it at 220C and used the ice cubes and spray mist. It was more golden but there was no blistering or caramelisation. I also felt like the tension wasn't right, at BSB it was firmer when doing the finger print test just prior to baking whereas mine was very light and puffy and spread easily and didn't hold its shape.

It took about eight loaves until I got something that I felt like I was proud of so if your sourdough doesn't work straight away, don't be discouraged. Paul tells us that bakers takes months baking daily to achieve the desired golden loaf and correct shape.

So you want to make your own sourdough? Here's is Bourke Street Bakery's ratios for making the perfect sourdough:
-
Starter 234.38g
-
Organic flour 440.63g
-
Salt 12.19g
-
Purified water 211.82g (I found that I used less)
-
Dough weight: 450g/1 pound loaf
Troubleshooting sourdough problems
My starter has a dark liquid layer on top.
Is that bad? No, you can tip it out or you can mix it back in.
My starter is dead!
You can try to revive it with some raisin water-the sugars may help bring it back.
How often should I feed my sourdough?
It depends on how often you bake it but once a week if you're not baking very often. Otherwise replace what you take out in weight.
Do I want to avoid lumps in the starter when we stir in the water and flour?
Some lumps are fine in the starter when you feed. Paul has found over mixing on the feed i.e. making it completely smooth, has a negative effect on the starter.
Can you overfeed a starter? What is the maximum schedule? Is it ok to feed it more than once a day?
According to Paul, the feeding schedule is activity dependent. Three feedings is the maximum recommended in one day and they should be at least 4-5 hours apart. If its hot then the gap period is shorter. If the starter is spending part if its time in the fridge then the gap period is longer. Paul suggests controlling it by keeping it in the fridge as air temperature fluctuates so much which has a drastic effect on the activity of yeast.
Do you have to be gentle with a starter?
You should be gentle with your starter. Once it's fed you don't want to jostle it around too much.
Can you recover if your dough is too light without enough tension?
Paul says if you've got to the stage of baking and it's too light and not enough tension then it's hard to recover. Re shaping and proving will probably not give you a good result. Paul suggests doubling the recipe, making 3-4 loaves and staggering proving and baking to see if that helps you grasp the correct time for the doughs to be baked.
My sourdough doesn't have a waxy crumb.
You will want to wait at least half an hour before slicing the bread.
My sourdough doesn't have a brittle crust.
Be sure to cool it on a rack so that the bottom develops a crust and doesn't become soggy.
So tell me Dear Reader, are you a bread baker? And what's your favourite sort of bread to make? And do you have any suggestions on what I should call my starter? I was thinking of "Sookie" from True Blood also because its a bit temperamental but any other suggestions are welcome!
NQN and Girl Next Door attended the class as a guest of Bourke Street Bakery


Reader Comments
Loading comments...Add Comment