A couple of weeks ago my friend Celia and her husband Pete sat me down to give me an update on Casa Chicken and the chicken called Not Quite Lorraine. Looking down at me over the top of her glasses she said, "Lorraine that chicken of yours is completely mad. She's the maddest of the lot. She's so unbelievably inquisitive and geez can she eat."
I didn't know what to say except well you name a chicken after me and it's quite likely that it is going to be just like me.

Mr NQN also says that I take after my parents in some ways and sometimes my mother. The saying does go Like Mother like Daughter although my mother hand I have very different politics and personalities. She's conservative and religious, I'm more "live and let live" crossed with vague karma and agnostic ideals. But there are things that we both love. We both love ribbons, lace and pretty packaging so it was with her in mind that I attended a vintage cupcake class with Couture Cakes in Georges Hall.

Couture Cakes is owned and run by Mary Armao and her husband and the business is run from their home. It was only six years ago that she was attending Planet Cake cake decorating classes. Bitten by the cake decorating bug Mary decided to start her own cake supplies store and hold classes on cake decorating. The classroom is small but we have all the space that we need and it's only the distraction of the well stocked shop just next to the classroom that we need to worry about.
Planet Cake: How to make a designer handbag
Planet Cake: How to make Alice in Wonderland Cupcakes

"It became somewhat of an addiction for me and I started seeing cake designs and inspiration in everything! I started off working from home in a tiny little space making cakes for family and friends. As I grew I began getting new clients and expanding my portfolio and it wasn’t long before my workspace became way too small. I used to drive past this little shop every day that was for lease and I would always think, “Hmmmm… I wonder if I could…,” Mary explains.

In today's class, Mary is going to show us how to decorate six vintage style cupcakes. Proof that the popularity of cupcakes still hasn't waned, this is her most popular class. It is also the perfect beginner's class as it teaches you basic techniques that you can apply to larger cakes or cookies and even though I decorate a lot, I find that also learn new techniques and about exciting new products to make cake decorating a bit easier.

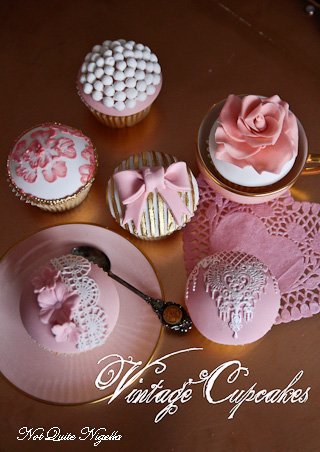
Mary shows us the six finished cupcakes. They're vanilla cupcakes decorated in pretty pastel pink and white with gold dust finishings and delicate touches. We crowd around and watch her decorate and then adjourn back to our own tables to complete the task using the tools provided. She starts with the antique rose as it needs longer time to dry and we switch between cupcakes in order to maximise the three hours which flies by when you're making cupcakes!
I'm sure even the inquisitive and curious Not Quite Lorraine would approve of them!
So tell me Dear Reader, is your taste the same as your mother's? Will you end up baking something for your mother this Mother's Day?
Psst! This week we will be holding a giveaway for some decorating sets from Couture Cakes so that you can decorate your own vintage cupcakes!

Striped Bow Cupcakes
The striped bow cupcake is one of the easier cupcakes to make and requires two pieces of equipment. One of them is a brilliant idea that is new to me and those that have made multiple decorated cupcakes will love this. It's a foam dome that allows you to create the fondant shell ahead of time.
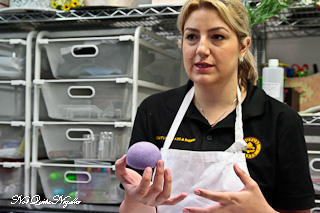
Once you have your cupcakes, just choose the size of cutter you need. Too small and your cupcake will be exposed to air and will dry out and too large will look unsightly. Once you have the correct cutter you can roll out your white fondant - you want it a bit thicker so that it can take on the pattern of the striped rolling pin.

Take the striped rolling pin and roll it firmly and deeply one way only. Use the cutter to cut out the circle and then gently lift onto the foam cupcake dome and smooth down all of the sides. Make sure that it sits in the centre of the dome. Allow it to set.
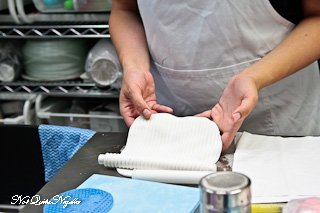

Take a piping bag of buttercream, pipe some in the centre and once the fondant cupcake dome has set, gently place it on top of the cupcake. The buttercream will adhere it to the cupcake. It's always better to start with a little bit of buttercream and add more if you need it than to add too much.

To make the bow, you can use a ribbon cutter that cuts out even strips. You can of course use a ruler and a knife but a ribbon cutter is easy for multiple cupcakes. Make the centre of the bow by cutting off a small length and then dabbing water at the sides and centre with the water pen. Fold the outside pieces to the centre and pinch the centre in to form a bow.


Then cut the strips of fondant in half horizontally and cut out two triangles as shown to make the ends of the bows. Fold this in half and adhere to the cupcake using the water pen and then affix the bow on top. Then using a little of the thicker bow stripe make the centre of the bow - folding over the sides makes it look more realistic and adhere this to the bow.

Finish with painting the stripes with gold. To make liquid gold, use gold colouring mixed with rose spirit rather than vodka as rose spirit has a higher percentage of alcohol so that it evaporates quicker and doesn't wet the fondant.


Paint the raised stripes with liquid gold edible paint.

Sparkling Chandelier Cupcakes

This is another straightforward cupcake made possible by the use of silicon pattern mats. To use the mats, you simply dust it lightly with cornstarch and then shake it so that it is evenly but lightly dispersed in the crevices.

You don't want too much that the cornstarch appears in the cracks as it is hard to get out.

Roll out the pink fondant, again fairly thickly as you want it to be able to take on the impression. You place the mat pattern side up and roll it away from you in one direction once. An impression should come out. I chose a chandelier pattern called "Virginia" for mine and I found that because it was so intricate I had difficulty rolling out all the detail but you can always start again using the same fondant re-rolling it.
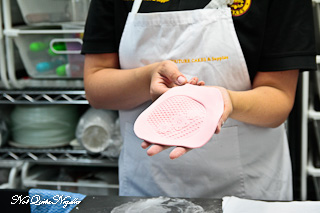
Once the fondant has set a little and dried, take a silver shimmer powder and mix it with some rose spirit and using a brush, brush it gently at a horizontal angle so that only the raised parts of the pattern are coloured silver.

Lace Flower Cupcakes
This is one of the more difficult cupcakes because of the lace detail but once you get the hang on the process of making the lace, it's rewarding. Mary uses Dab paste (an instant icing paste) for this and the key is to have the dab paste as soft as possible to achieve this. Otherwise it won't work. To make the lace, you need a non stick mat, a silicon lace patterned mold, a palette knife and a small ball of soft dab paste warmed in your hand through kneading.

Place the lace mold on the non stick mat (or it's even easier if someone helps by holding the lace mold down for you). Take the Dab paste and place it on the end and smoosh (that's a real term ;) ) the dab paste away from you using the palette knife held at an angle. You should have just enough dab paste in the mold to see the pattern as shown.

Then gently prise it out of the mold millimetre by millimetre. You now have your lace! Slice it in half horizontally and using the water pen, place it on the cupcake. The water pen is another brilliant idea and replaces having a brush and a container of water handy to affix fondant.
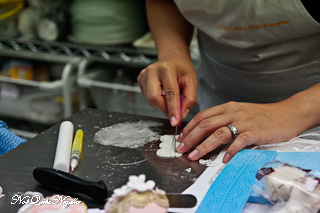

Don't be discouraged with this. It takes practice to get this right and when you do, the results are beautiful. And you're only doing it right if your thumbs hurt ;) It's painstaking work and that is why Mary doesn't recommend doing this for large cakes.

The flowers are made using five petal flower cutters and Mary places these in a two part silicon mold press and presses gently. They pop out with lovely striations on them. Place them in a safe place to dry a little. Once the petals are firm, adhere them to the cupcake using the water pen.

Pearl Cupcakes

The pearl cupcakes can be done one of two ways. You can either roll out a small log of white fondant and then cut even pieces with a sharp paring knife. You then roll out each ball to make the pearls. This is time consuming obviously and if you're doing multiple pearl cupcakes, the quickest way is by using a silicon pearl mold.

Here you dust the mold lightly with cornstarch and then smoosh the white fondant into the mold. Using a sharp paring knife, trim any excess off and if there are any little bits, just rub them off the silicone with your fingers. Then bend the silicon mold to stretch and the pearls will pop out as a pearl necklace (perhaps in several parts).


Using a water pen, wet the top of the cupcake dome (shown in striped bow cupcakes) and then starting in the centre, gently place the pearl necklace on the cupcake. You'll need two lengths of the necklace mold per cupcake.


Embroidery Cupcakes
This is one of the simplest but most effective decorating techniques. I remember when I first did it I was amazed at how effective and easy it was. I used a mold pattern to create my flowers but Mary shows us how to do this freehand.

To make the embroidery pattern you need a small paintbrush, a little water and a bag of pink royal icing. Take a cupcake with a white fondant dome. Using the royal icing piping bag, pipe three number "3" to form a rough flower as shown-the threes all join together. Make them quite thick. Then lightly wetting the paintbrush, pull the royal icing into the centre of the flower and this will create the pretty drag marks. Repeat drawing five "3"s as shown and repeat. You can also draw leaves and partial flowers. The key is to not use too much water - I dabbed the brush in the water and then on my hand to absorb excess water.
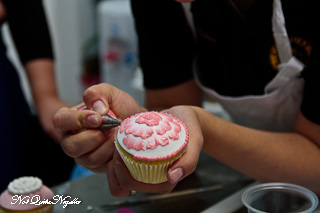
Around the edge you can use the royal icing to make a scalloped edge too. Once the royal icing has set you can colour it gold with a fine paintbrush using the liquid gold as detailed in the striped bow cupcakes.
Antique Rose Cupcakes

I've left my favourite cucpake until the last and it is also the most time consuming too. Roses can be made by using a simple set of round cutters and a balling tool, foam mat, scissors, toothpick, styrofoam square and a bag of royal icing.

Mary has already made the start of the antique rose for us. Resembling a cotton bud, it is a bud of white gum or petal paste shaped on the end of a toothpick. Gum or petal paste is faster to set than fondant although you can add CMC or tylose to fondant to create gum or petal paste. This is the only cupcake in which we'll use it.


It is also harder to roll but you'll need to roll it out thinly. Mary advises using a pasta machine as it is the easiest to achieve the thin, even thickness. She rolls up and down rather than from side to side and once this is ready, she covers it with a double piece of vinyl to stop it drying out as it dries out quickly.

She uses a set of cutters and uses a small round cutter to cut out one circle in the gum paste. She then uses the next size up cutter to cut out three circles. To give these a more realistic look, she uses a balling tool to smooth out and roll out the edges. You keep half of the balling tool on the circle and half on the non stick blue mat and roll back and forth pressing firmly but gently. Do this just on the top of the circle. The result is fluted petals on one side that resemble rose petals.

She lightly wets the bottom of the petals and picks up the smallest single petal and sticks it to the toothpick. She wraps it around so that no white is showing and it creates the centre of the rose.

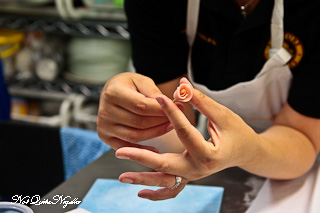
She then takes the remaining three slightly larger petals and wraps one around the bud leaving on side loose. She then inserts the second petal in where it is loose and then pinches the first petal down gently but firmly. This is essential to make sure that the rose stays together. She completes the rest of the petals mirroring the process until she gets a small rose which she sticks into foam to allow to set.


Then it's time to make the next rows of petals. Mary cuts out five circles and then frills the edges as before. To make the bigger petals you need a toothpick or piece of skewer and you roll the edges of the petal on the fluted side in two places as shown. With practice you may not need the skewer and you can just roll the petal with your fingers. Mary recommends doing this in front of the television as it is a repetitive task but one where you don't really need to concentrate.

You then cut out seven even larger petals, fluting the circles and rolling the edges as above. You want these to dry in a container with circular depressions so that they get a rose petal shape. Allow these to dry.

Then using the five size petals, wet them using the water pen and then using the same method above. You may not need all five petals, I only needed four. Allow to set on the foam. After about half an hour, adhere the seven larger petals onto the rose. Then once the rose petals are firmly affixed, take a white domed cupcake and place a little royal icing in the centre to stick the flower.

Carefully remove the toothpick from the rose -do this carefully and slowly. Then trim the bottom of the rose so that it can sit on the cupcake. If the petals start to droop, take the royal icing and use it as a glue. Royal icing sets quickly but you will need to put some scrunched up paper towel or tissue to help the petals keep the shape while the icing sets.


Reader Comments
Loading comments...Add Comment