Ever since I was sent a copy of "The Painted Cake" by Natasha Collins and read up about how relatively straightforward it is to paint a cake I've been thinking about little else. While I love cake decorating I will preface this with the fact that I have little to no skills with drawing or painting. As a child in primary school I would get in trouble for colouring outside the lines repeatedly. My skills lie firmly within the eating realm (and is that really a skill?). My father, a painter, no doubt has rued the fact that my sister nor I have inherited his painting gene.
But you see with these painted cakes, despite what you may think, they don't require much talent with drawing nor a steady hand. Because all you really need is a pattern or picture that you like and this magical thing called tracing paper does the rest! I know, how brilliant is it? And here's my "And that's not all, there are steak knives!" moment, you can also erase any errors in your painting LIKE A BOSS!!!
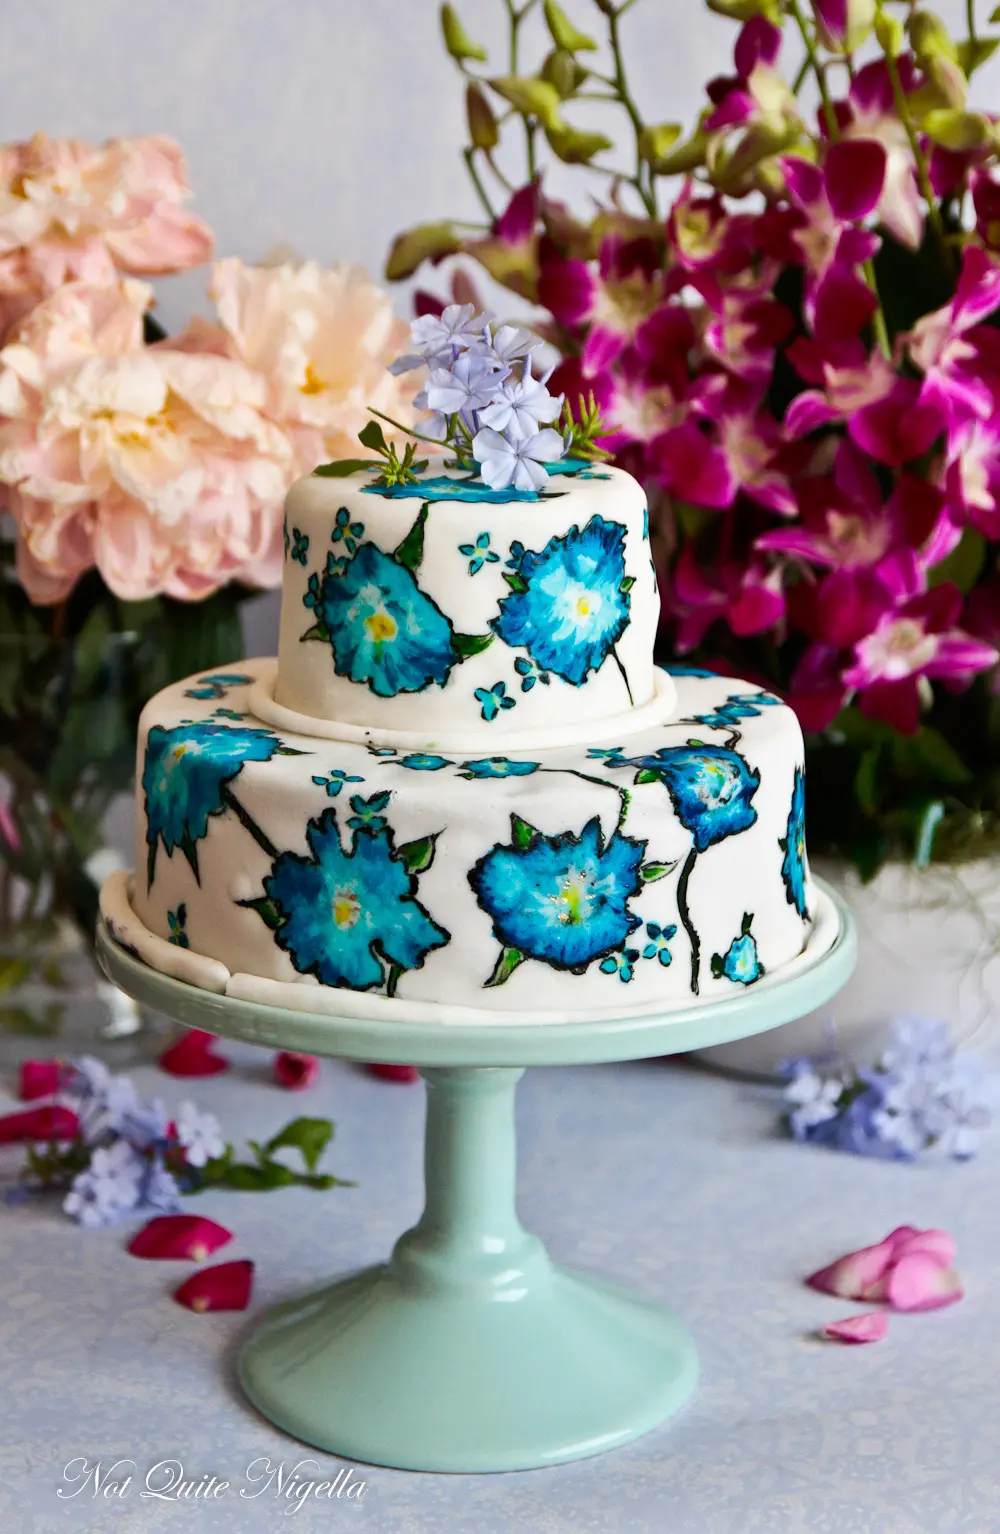
Honestly, I got so worked up there I think I even threw confetti and blew one of those NYE blowers. Seriously my lovelies, this is achievable cake decorating because quite honestly if I could achieve it, anyone can. The pattern that I used was from a plate that I bought a few weeks ago. I fell in love with the colour and the pattern. What Natasha said is that no cake flower painting is ever going to be as pretty as the original i.e. the flower in real life so I was calibrated low. With my cake, I practised a lot on paper - you can use fondant but I was down to my last few packs of fondant and didn't want to waste it.
As always happens with me, I get about two thirds of the way through it and want to pack the whole thing in and have a bit of a moment. For me, it was only after I realised that I was using the wrong brush for the outline (too thick) and fixed that and the leaves went on that I thought that it might be worthwhile sharing. Once the stigmata was painted on, I felt a huge sense of relief. It looked like flowers! I even painted some flowers free hand. Anyway, I hope that you like it and give it a go! If a whole cake is too intimidating, then please try it on a single cookie or something like that. It really is one of those things that improves with practice.
Dear Reader, I cannot believe that 2014 is coming to a close. Honestly, if you had asked me what month it was, I would probably have said June but here we are, hurtling towards Christmas, candy canes in one hand and tinsel in the other while Halloween appears as if in the faraway distance. This extraordinarily busy time of the year means that things are so frantic that little things are forgotten. Two days last week Mr NQN left the house forgetting to brush his teeth. While last Monday I opened up a box of cotton tips and set them down somewhere and haven't been able to find them since. I must admit that I did check whether I put them in the fridge, freezer and cupboards to no avail. They still haven't turned up!
I've made a youtube video that shows the process a bit more clearly - even with a little appearance by my niece Natalie (and a BIG thanks to her parents Catherine and Roger!). And hey if I can do it without any drawing skills while I'm in the middle of watching Extra and TMZ then I bet you can too!
So tell me Dear Reader, is there a cake decorating technique that you'd really like to learn? And if you could have one talent, what would it be? Singing, painting, dancing, writing or acting? Or something else altogether? And what is your favourite flower?
How to Create A Floral Painted Cake!
Did you make this recipe? Share your creations by tagging @notquitenigella on Instagram with the hashtag #notquitenigella
Rated 5 out
of 5 by
5 lovely
readers. Share your rating:
Inspired by "The Painted Cake" by Natasha Collins by Murdoch Books, sent for review
A fondant coated two tier cake - ensure that the fondant isn't soft and has set firm without any cracks
A pattern that you like the look of (bigger patterns are easier than fine patterns)
A 2b pencil (they don't use lead in pencils anymore so don't worry :) )
A sheet of baking paper or tracing paper
3x #8 brushes (you don't need to use expensive brushes)
1x #1 brush
Food colouring (I used a sky blue, yellow, leaf green and black, all in gels)
A palette
A cup of water (tap is fine)
A little bit of advice - I would definitely recommend practicing this on paper or rolled out fondant before you try it on the cake itself. This is to get to know the brush and the amount of liquid that you will need on the brush. I used a #8 brush for everything but tracing outside the flower for which I used a #1 brush.
Step 1 - Trace the pattern on the parchment using the pencil. Trace enough to cover a 20cm or 8 inch cake. I drew freehand leaves at the end and concentrated on tracing the flowers. Take the cake and place the paper pencil side against the cake and use the rubber end to transfer the pattern. This is why you need the fondant to be set because as you can see I couldn't wait (hello impatient!) and the fondant had some of my fingerprints. This will be your outline. I darkened the outline a bit with pencil.
Tracing the outline
Step 2 - The key to making pretty flowers and pictures is to have at least three layers of colour from lightest (aka barely able to see) to medium to dark. This helps create a more realistic effect. Start with some water and a little food colouring. I make sure to test out the strength of the colour on a piece of paper before I touch the cake with the brush. Colour in the flower with the palest colour.
Colouring with the lightest shade of blue (#8 brush)
Step 3 - Using another cavity in the palette mix some water with more gel - this time use more gel and less water to make a medium strength colour. Paint the outside of the flowers and some of the inside with this stronger colour. I also drew little four petal flowers with this colour.
Making highlights using a darker shade of blue (#8 brush)
Step 4 - Take the number 1 brush and fill a cavity with the black gel. Lightly dip the brush into it and carefully trace around all the flowers.
Drawing the outline in black (#1 brush)
Step 5 - Using the #8 brush again add a little water to some blue gel and draw little highlights on the flower. They can be small and done freehand (just leave the centre free for the yellow stigma). The three shades of blue add depth to the flower.
Using pencil to draw freehand leaves and stems
Step 6 - Draw stems and leaves with the pencil Repeat the process with green by layering on a really light shade of green for the leaves and then a darker shade. I just used two shades of green for the leaves and the darker one for the stem.
Colouring in leaves (#8 brush)
Step 7 - Take a new #8 brush or a cleaned one and dip the tip in a little yellow gel. Finish off the flower with a yellow stigmata!
Tips: If you have an unsteady hand, use your other hand to anchor your drawing hand. This is particularly useful for intricate work or when you have been painting a lot.
Troubleshooting: It is entirely possible to erase any painting mistakes provided that the fondant doesn't have any cracks in it. All you need to do is get a clean #8 brush, a cup of water and a paper towel. Dip the brush into the water and gently rub the wet brush against the colour. Use the paper towel to dab at any excess water.
Wash brushes under cold water only
Gently dab brush in hand soap and smooth back to the original shape
Cleaning your brushes: always wash brushes in cold water, never hot. Separate the bristles gently to remove all of the colour and try to keep them in a natural shape. Place a little hand soap on a plate and dab the brush in it. Using your finger, smooth the brush back out to its natural shape. Place in a glass to dry. When ready to use, wash it out with cold water and it will retained its shape.


Reader Comments
Loading comments...Add Comment