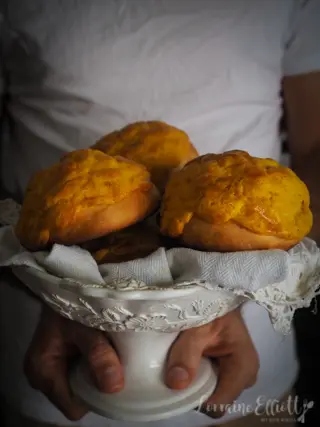
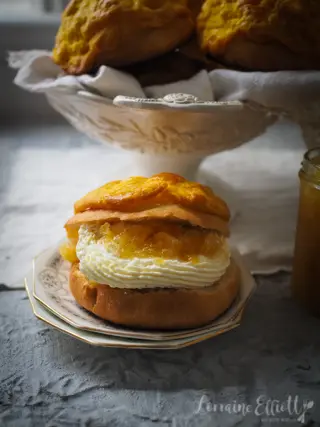
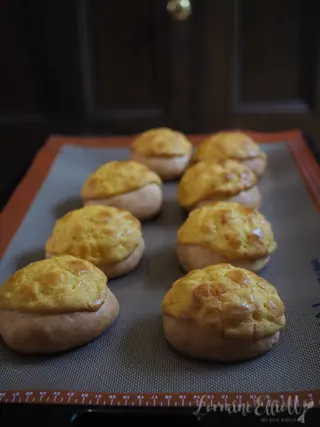
Pineapple bun - or Bolo Bao - time! If you love those sweet Hong Kong bakery treats, you'll adore this delicious, incredibly soft homemade version. Serve one with a thick slab of butter like the classic Bo Lo Yau, or split them and tuck in pineapple-and-coconut jam and clouds of vanilla whipped cream. This is a pushy recipe, Dear Reader!
Pineapple buns or Bolo Bao or Bo Lo Bao are a classic Hong Kong Chinese sweet bread treat. The bun is sweet and soft, like a milk bun and there is a layer of yellow biscuit or cookie topping that is crunchy and sweet in texture. Ironically pineapple buns contain no pineapple at all; their name derives from the pineapple-like pattern on top (it's more apparent before it is baked). Japan's Melonpan or Korea's Soboro bun is very similar. Pair a pineapple bun and a cup of Hong Kong milk tea and you've got a classic Hong Kong breakfast or afternoon tea. Pineapple buns can come with a slice of butter inside (where it is called Bo Lo Yau) or custard too. The origins of the pineapple bun are murky at best, some say it came from Shanghai, others via Portuguese or Mexican migrants.
Like all Asian style soft breads, this starts with a tangzhong roux. This tiny and very step creates the softest, bakery style bread and I urge you if you are new to it, to give it a try. Your hot cross buns or bread will never be the same again and you will marvel at how soft the bread is and how long it stays that way.
I've been leaning on the Thermomix in the new kitchen as there isn't a lot of space to store things and so my mixer sort of gets put away in the cupboard but the Thermomix gets a bit more use so it sort of earns it place on my sideboard. This is the perfect recipe to go into the Thermomix but you can also use a stand mixer to make these too. I also made the jam in the Thermomix and whipped the cream in it just because I'm finding a gas stovetop can be quite fast whereas I can walk away from a Thermomix and let it do its thing.
When I was making these I wondered what if we filled a Bolo Bao or Pineapple Bun with a homemade pineapple jam and vanilla whipped cream?! Turns out they are AMAZING! Like ABSO-FREAKIN AMAZING!
Sorry I got a bit excited there but I am very happy Dear Reader because I finally got my oven to work! I started researching ovens and I narrowed down my list of ovens but it hit me one day that perhaps the main problem was with my oven door. It's hard to know what temperature it is set at, as everything is rubbed off and when I asked the former owner she wasn't helpful and just told me to download the brochure (which I had already looked for but it was such an old model that the brochures didn't match this model). While things baked through nothing browned and my bread was pale and corpse-like pale (yes I watch too much True Crime).
"What if I gaffa tape the oven door closed?" I asked Mr NQN.
"Not a good idea," he said.
But like foolish people who end up in the Darwinian Awards list I ignored him and got out the gaffa tape. Turns out that gaffa tape doesn't stick to the hot glass and metal of an oven. "Arrrgh!" I said then looked to the right of the oven and saw my garbage bin. I decided to push the garbage bin against the door and test out one tray of pineapple buns. I had a thick row of tea towels and an oven mitt so the bin wouldn't warp or melt and I crossed my fingers. I turned the oven up to the maximum and 10 minutes in things were smelling caramelised. I opened the oven and things were browning and within a few minutes, well they were very brown, perhaps too brown. But I had browning!!
I slid the second tray of these pineapple buns in and turned down the heat (I think!) to gas mark 5 or 190C/384F. 12 minutes in it was smelling good, great even and it was a different smell, more in line with cookies and biscuits rather than caramel. I opened the door and did a happy dance. The buns were browned but not overly so. In fact they looked just about perfect! And that my lovelies is how people end up on the Darwin awards list because they end up thinking they always know best haha.
So tell me Dear Reader, do you like pineapple buns? Do you ever do things against other's advice?
Pineapple Buns
All Original Recipes by Lorraine Elliott
Preparation time: 45 minutes plus 1.5 hours rising time
Cooking time: 20 minutes
Serves: 12
For Dough
25g/0.88 bread or all purpose plain flour
1/2 cup/125ml/4.2flozs water
3/4 cup/185ml/6.5flozs. milk
1/4 cup/55g/2ozs. caster or superfine sugar
1 egg, room temperature
65g/2.2ozs. butter, softened
490g/17.2ozs bread or all purpose plain flour
1 tablespoon milk powder
3 teaspoons instant dried yeast
1.5 teaspoons fine salt
For Topping
55g/2ozs. butter, softened
150g/5.3ozs. caster or superfine sugar
1 teaspoon vanilla bean paste
1 egg yolk
1 tablespoon cream or milk
Gold or yellow food colouring
120g/4.2ozs. plain all purpose flour
Fat pinch of baking powder
Egg wash to glaze
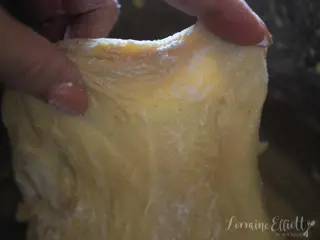
Step 1 - Place the 25g or 1/6 cup of flour with the water in a small saucepan and whisk. Heat gently to 65C/149F until it forms a roux. Whisk in the milk, sugar, vanilla, egg and butter. Add the remaining flour, milk powder and yeast to a mixing bowl and add the roux mixture. Knead for 10 minutes until the dough is elastic and you get the windowpane effect (where you can pull the dough apart with floured hands). Shape into a ball and place in a very large bowl and cover and allow to rise for 1 hour until triple the size. Once risen knead in the salt.
Windowpane effect
**Thermomix directions: Place the the 25g or 1/6 cup of flour in the Thermomix bowl and set to speed 3, 10 seconds. Then set to speed 4, 65C for 6 minutes or until it becomes a roux. Add in the milk, sugar, vanilla, egg and butter and set to speed 4, 10 seconds. Add the remaining flour, milk powder and yeast to the Thermomix bowl with the roux mixture. Set to knead for 7 minutes until the dough is elastic and you get the windowpane effect (where you can pull the dough apart with floured hands). Shape into a ball and place in a very large bowl and cover and allow to rise for 1 hour until triple the size. Once risen knead in the salt. **
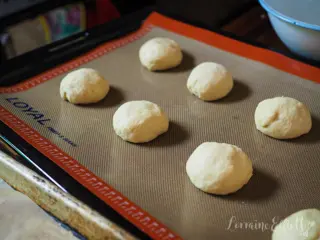
Step 2 -Divide the mixture into 12 even portions (my total dough was 970g/34ozs so each ball was 78g/2.7ozs. each). Place on 2 lined baking trays giving them at least an inch space apart as they will rise and expand.
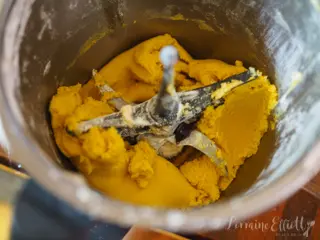
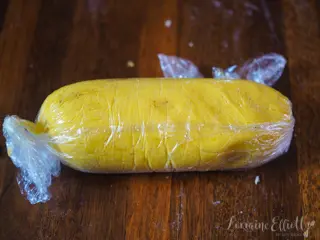
Step 3 -Meanwhile make the topping. Beat butter and sugar until pale and fluffy. Add vanilla, egg yolk, cream and 2-3 small drops of food colouring and beat for a minute. Then on slow speed add the flour and baking powder. It should form a dough. Scoop out onto a sheet of cling film and shape into a log and freeze for 20 minutes.
Thermomix directions: Meanwhile make the topping. Place the butterfly attachment in the Thermomix bowl and beat the butter and sugar until pale and fluffy for 1 minute speed #4. Add vanilla, egg yolk, cream and 2-3 small drops of food colouring and beat for 1 minute speed #4. Then add the flour and baking powder and beat for 20 seconds speed #3.5. It should form a dough. Scoop out onto a sheet of cling film and shape into a log and freeze for 20 minutes.
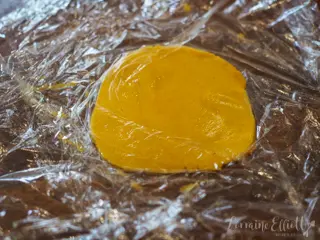
Rolling out topping between cling film
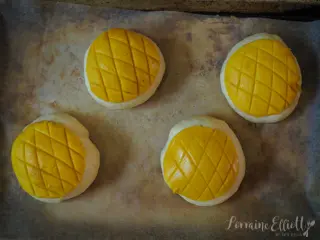
Step 4 - Preheat oven to 190C/384F. Remove the log of yellow dough and cut into even portions (my yellow dough was 350g/12.4ozs) and each was 29g/1ozs. You want to keep this topping fairly chilled so put them in the fridge and work with 3 at a time. Roll out between two sheets of cling film (not too thin) and use a 8cm/3.1inch round cutter to even out the disc and gently place on top of the buns. Repeat with the remaining yellow dough. Then using a dough scraper imprint a pineapple or diamond pattern on top of the yellow dough. Brush with egg wash and bake for 15-17 minutes. Serve warm and split and filled with pineapple jam and whipped cream or a slice of butter.
Placing topping on top of buns
Making hatch pattern
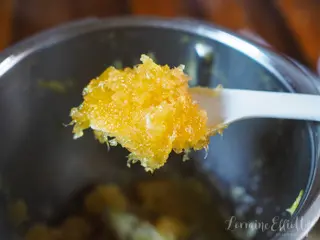
Pineapple and Coconut Jam
320g/11.3ozs pineapple pieces (drained from a 400g tin of pineapple)
1 cup/220g/7.7ozs white sugar
1/2 cup pineapple juice
1/2 cup desiccated coconut
1 teaspoon vanilla
Step 1 - Blend pineapple until crushed in texture and drain reserving the liquid. Add to a saucepan with the sugar and pineapple juice. Simmer for 10-15 minutes until starting to colour and brown. Add the coconut and vanilla and simmer until fragrant. Place in a jar. It will last for 1 month in the fridge or you do the whole canning procedure it where it can last on the shelf for longer.
Thermomix directions: Drain pineapple and place in Thermomix bowl. Set to speed #5 for 20 seconds. Add sugar and pineapple juice and set to cook for 25 minutes, speed #1, 100C. Add the coconut and vanilla and cook for 3 minutes, speed #1, 100C. Place in a jar. It will last for 1 month in the fridge or you do the whole canning procedure it where it can last on the shelf for longer.
Share this recipe
Send it to someone who would love making it or eating it.


Reader Comments