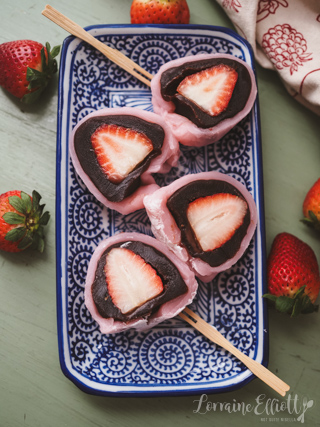
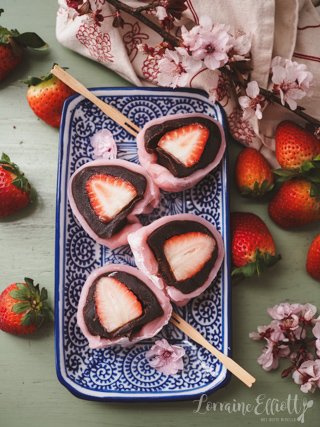
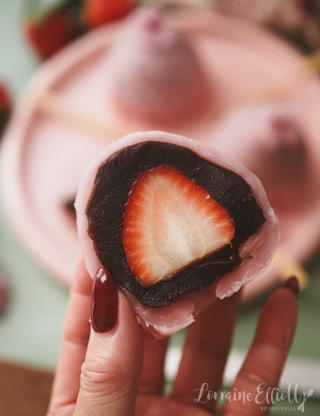
Strawberry Mochi Daifuku or ichigo daifuku, is a Japanese sweet made with a whole fresh strawberry wrapped in red bean paste and soft, chewy mochi. This easy microwave mochi recipe includes all my tips for choosing red bean paste, getting the perfect pale pink colour and wrapping the strawberries without making a sticky mess. There's also another option if red bean isn't your thing!
About This Strawberry Mochi Daifuku
Strawberry Mochi Daifuku (or ichigo daifuku in Japanese) is a delicious type of mochi where a whole strawberry is wrapped in red bean paste and then a chewy mochi skin. It is a type of Wagashi (traditional cake) and the word "daifuku" literally translates to "great luck" or "big fortune". You can find more Japanese recipes here.
Strawberry Mochi Daifuku are usually eaten from Winter to Spring when strawberries are in season or at Japanese new year festivals. This time is also the time when cherry blossoms are in season so I made mine in a light pink colour to match the cherry blossom petals. They are usually enjoyed for afternoon tea with green tea.
Video How To Make Strawberry Mochi Daifuku
Video: Strawberry Mochi Daifuku Recipe
Ingredients For Strawberry Mochi Daifuku
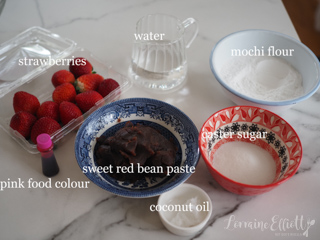
Strawberries - Fresh, juicy strawberries. The sweetness of the strawberries really affects how good the end result is. You want similarly sized medium strawberries (weight is specified below). Smaller strawberries are easier to work with especially the first time. If you have a lot of strawberries, I have more strawberry recipes too.
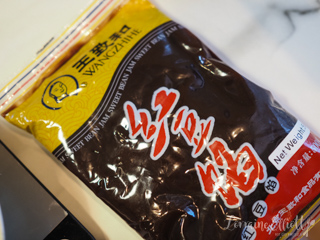
Red bean paste - I used a few different brands and my favourite brand was by Wangzhihe Sweet Red Bean Paste. It is inexpensive at $3.50 for a 500g/1.1lb packet and can be found at Asian grocery stores. It isn't completely smooth and has the occasional whole bean but the flavour was much better for this than other brands like Sugar Honey that were more expensive.
Mochi or glutinous rice flour - Make sure that the packet of flour says "Glutinous" and not just "rice flour". This is what gives mochi its signature chewiness. It is also gluten free. You'll also find this at an Asian grocery store (along with red bean paste and potato flour). Other recipes that you can use up the rest of your mochi flour are these pumpkin pie butter mochi, mochi brownies, sweetcorn butter mochi, mochi donuts, Tangyuan black sesame balls and Snow Skin Mooncakes (you can probably tell that I love mochi - after all I named my soul dog Mochi after it!).
Sugar - Caster or superfine sugar so that it dissolves into the dough easily.
Pink food colouring - Use very sparingly. Can omit if you want too.
Oil - Use coconut oil or any flavourless oil (avoid olive oil or avocado oil as you don't want to add too much flavour or colour).
Potato flour/starch - This is a gluten free flour that can be found at Asian grocery stores. Cornflour/fine cornstarch can also be used but potato flour is better as it prevents sticking without leaving a raw, powdery flavour that corn flour gives.
Strawberry Mochi Daifuku Recipe
An Original Recipe by Lorraine Elliott
Recipe Overview
Preparation time: 30 minutes
Cooking time: 5 minutes
Serves: 6
Ingredients Needed
For Filling
6 x 18g/0.6oz strawberries
360g/12.7ozs red bean paste, chilled divided into 6 x 60g/2oz balls
For Mochi
150g/5oz mochi or glutinous rice flour
75g/2.6oz caster or superfine sugar
225ml/8fl oz water
Pink food colouring
1 teaspoon oil (coconut oil works well)
Potato flour/starch for rolling
Step-By-Step Instructions
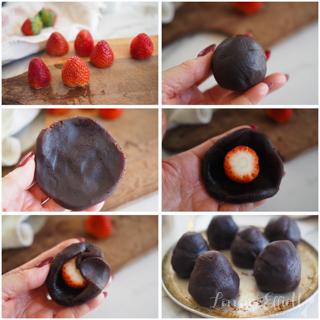
Step 1 STRAWBERRIES - Wash, dry and trim the strawberries so that they sit completely flat and level. Take a ball of red bean paste (60g/2oz per strawberry) and shape it into a ball and then flatten it. Place one strawberry (1 strawberry) pointy side down and envelop with the red bean paste on all sides. Place on a plate. Repeat with the rest of the strawberries and red bean (washing hands between each one). Smooth over the sides and then place in the freezer to firm up (freeze for maximum 20 minutes).
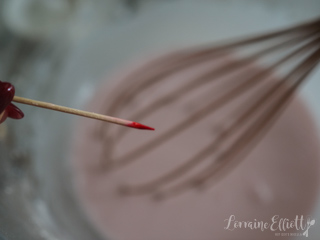
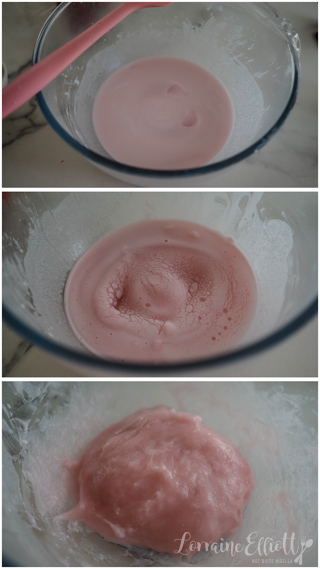
Step 2 DOUGH - In a microwave proof bowl, whisk the mochi flour (150g/5oz) with the caster sugar (75g/2.6oz) and then whisk in the water (225ml/8fl oz). Add a little food colouring using a toothpick (do not use the dropper, the colour will be too strong). Whisk the colour in until you get a pale pink. Cover the bowl with clingfilm and microwave for 1 minute. Stir and re-cover and microwave for another 1 minute. Then stir and recover and cook in 20 second bursts until the dough turns from opaque to semi translucent. Add in the oil (1 teaspoon) and stir using a stiff spatula.
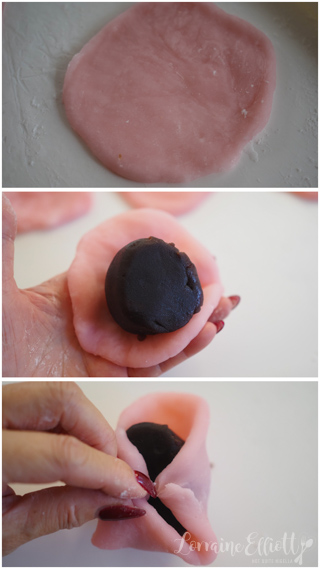
Step 3 ROLL - Dust a chopping board or surface with potato starch and place the dough on this. Divide into 6x60g/2oz portions (you will likely have more than this but having more is better than less, especially the first time you make it). Roll dough (60g/2oz per mochi) into balls and then using a small rolling pin, roll out into 10cm/4inch circles and then allow to cool for 5-10 minutes until completely cool.
Step 4 WRAP - Lightly flour your hands and a plate with potato flour. Take one mochi disc and see which side looks better (there's always one). Place one strawberry (1 strawberry) pointy side down and then gather the edges to come together and gently twist them to stick them together. Place the finished mochi on the floured plate. Repeat with the remaining mochi and strawberries. Mochi is best served on the day that it is made.
Personal Note
Normally, I usually try to give away sweets to my neighbours especially ones like this as they are best eaten on the day. However one person stopped me from doing that.
"Have you finished taking pics?" Mr NQN asked me. I had put down my camera and was about to sit down to go through the photos.
"Can I have them?" he said edging closer to the plate. "Sure, take this plate," I said offering him the plate with 2 daifuku cut in half. "How about those?" he said gesturing towards a bigger plate with 4 of them.
And that Dear Reader is how Mr NQN devoured six of these daifuku one afternoon!
So tell me Dear Reader, how many do you think you coudl eat in one go? Do you like mochi?
Share this recipe
Send it to someone who would love making it or eating it.




Reader Comments